With the fashion industry changing so rapidly all the time, it’s hard to keep up! That is why Makeup & Wearables is teaming up with other web pages to create one space to learn all about up to date topics of the beauty and fashion space.
We are happy to announce our acquisition of nailpolishwars.com. With their knowledge on topics surrounding the nail scene, we can expand our online library and become a one stop shop for people interested in learning more about beauty topics.

For example, with our recently acquired knowledge on nails, you can visit makeupwearables.com to learn about fashion, hair, nails, and more all in one go – instead of flipping through multiple different websites.
After all, our main goal at Makeup & Wearables is to make the lives of our readers easier.
Gel nails
Gel nails are a popular method of painting nails as they last longer than regular polish but tend to be less damaging than acrylic nails.
These types of nails are easily done at home provided that you have the correct lamp, base and top coats, and accessories. It can take some time to master the craft of gel nails at home, so don’t give up and keep practicing – you’ll get there, and you’ll save a lot of money in the process.
Unfortunately, you cannot air dry gel polishes and you will need a UV lamp to bond the gel to your nails. The initial investment is a couple hundred dollars, but you’ll save this by not having to get your nails done at the salon again.
Acrylic nails
Gel nails aren’t the preferred choice for everybody, with acrylic nails tending to be the most popular way of getting nails done at the salon. Applying acrylic to your nails is a craft that many people can’t replicate at home, as beauticians go through professional training to learn how to apply acrylic nails properly.
However, it’s not impossible to do your acrylic nails at home. There are new kits being introduced to the market that make it an easier step by step process for you to do your own acrylic nails at home. Again, it’ll take some patience and a lot of practice, but you’ll save money in the long run.
Acrylic nails can come in any color, such as black, red, purple, or white. Be wary, however, if you’re planning on opting for white acrylic nails. Many of us fake nail lovers have learnt the hard way that white acrylic can stain and turn a yellow color before the set has run its course.
Don’t panic if you desperately want white acrylic nails, though. You’ll just need to learn how to clean them properly.
We’ve been talking a lot about fingernails, as these are the most common nails to get done at a salon. However, acrylic can also be used on toenails to provide you with an incredibly professional and long lasting pedicure.
Acrylic nails tend to be on the more expensive side, which is why many people opt for a cheaper alternative such as gel or nail polish. There are many alternatives to acrylic nails, although some people can’t think that these can’t compare to a classic set of acrylic nails.

Nail polishes
Nail polish is the most common way to paint your nails, but it is also the shortest lasting. Nail polish often chips and comes away from the nail quicker than gel or acrylic nails do, which means that they end up looking questionable within a few days to a week.
There are a few ways to keep your nail polish on for a little while longer, such as using a base coat or a nail primer. However, many people still find their nail polish chips within two weeks despite using these extra products.
If you don’t have any nail primer or base coat – don’t worry. You can actually make a homemade substitution from isopropyl alcohol and acetone. Who knew!
The market for nail polishes is a large one, and therefore has been expanding for many years now. Every few years or so a new unique product will hit the market and become the new nail craze for a few months. Remember when everyone had glow in the dark nails? Us too.
Nail polishes come in a variety of colors, too. You can get pretty much any color nail polish that you’re thinking of. Thanks to the ease of removing nail polish, you can also switch your look up within an hour so that your nails always match your outfit.
If you’re an indecisive person, you might even benefit from another nail polish trend from a few years ago – color changing nail polish! Alternatively, you can paint your fingernails with a clear polish for a professional look.
While nail polish is good for switching your nails up every week, it also comes with its fair share of disadvantages. As we’ve already mentioned, it chips easily, and it also takes longer than acrylic or gel polish to dry.
This is because it air dries instead of using a UV lamp. While there are a few methods of drying your nail polish quicker, they still won’t dry as quickly as another type that needs to cure under a light.
Other ways to paint nails
Gel, acrylic, and nail polish are the three most common ways of getting your nails done. However, there are also newer ways of switching the look of your hands up, such as nail dip powders. This method consists of dipping your nails into a colored powder and covering it with a clear sealant. These are relatively long lasting and don’t require a UV light to dry.
Dip powder nails can be a little difficult to remove, though, and they’re also harder to do than many people think. Many people who do dip powder nails at home end up with bumpy or uneven nails.
Silk wrap nails are another option, and these are similar to acrylic in looks but offer much less damage. These nails take a layer of silk where the plastic tip would usually go for acrylic nails. This leaves your natural nail with a lovely added length while still giving the appearance of your own nail.
Opting for acrylic overlay is another option if you’re wanting a more natural look. An acrylic overlay uses acrylic powder over your natural nails instead of an extension, leaving your natural nails less damaged.
If you’re a fan of gel nails over acrylic, you might also be interested to hear about polygel nails. These are kits that offer the best of both worlds – think of them as a hybrid between acrylic and gel nails.

Nail Accessories
When doing your nails at home, there is more than just the type of nail and what color to think about. Many at home nail kits require some other accessories to get the most out of your time.
If you’re using press on nails or fake nails that don’t directly bond to your natural nail, you will need to invest in a nail glue. Unfortunately, many nail glues have given the product a bad name due to the bond being easily broken.
So, you should invest in a high-quality nail glue that has been shown to stick fake nails to your natural nails well. While it might be tempting to use glue that is as strong as possible, don’t use superglue!
A nail drill can also be handy when doing your nails at home or doing someone else’s nails. Use different drill bits to achieve different outcomes, such as sanding, filing, and removing pre soaked nails.
If you’re thinking of becoming a nail technician, or just want as many tools at home to use when doing your own nails, make sure that you collect all of the necessary equipment to make your life as easy as possible.
When you do your nails at home in front of little hands, it’s not uncommon for them to want to copy you and have their nails done too. Children’s nails are thinner and softer than adult nails, however, so shouldn’t be subjected to acrylic or gel nails just yet. Instead they can use press on nails to match with you.
Getting your nails done
If you don’t want to learn how to do your own nails at home, you can go to the salon and get a trained beautician to do them for you. This is a much more relaxing experience than doing your nails yourself, as you can sit back and enjoy the salon experience.
However, it’s not all a relaxing experience, as there are some decisions that need to be made before the nail technician can begin working on your manicure.
First you will need to decide the shape of your nails. There are many types of nail shape, such as coffin nails, rounded nails, or pointed nails. Nail shape has the ability to make or break your manicure, so choose wisely!
You will also need to decide whether you’re going to be adding more length to your nails or not. If the answer is yes, then you’ll need to choose tips or no tips.
Tips can damage your nails further and leave your natural nail compromised. If you’re wary of damaging your nails, you might opt for nail forms instead. These sit underneath your nail while the acrylic is being applied so that the nail technician can achieve the desired length with acrylic alone rather than tips.
These nails might be slightly less durable than if you were to have opted for tips, and the acrylic will still damage your nail underneath to an extent. The choice is yours!
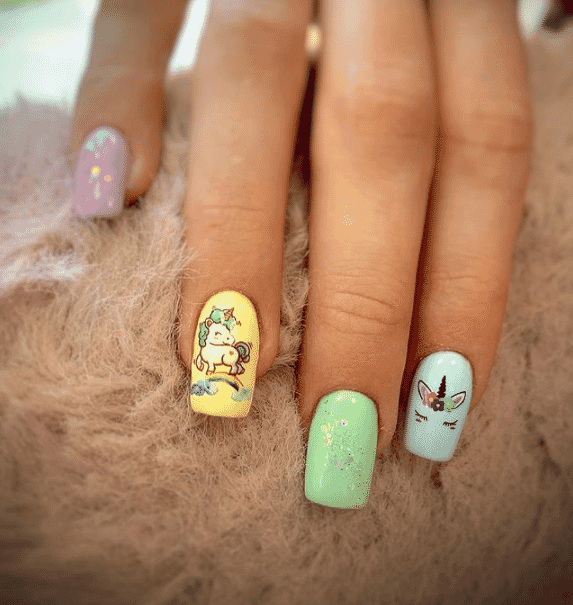
Finally, you will also need to pick a design for your nails. This is where the fun starts. Professional nail technicians are often very artistic with their craft and will accept a number of challenging designs to perform on your nails.
You can choose anything from a simple design with only one color to a complex design that would only be achievable by a professional.

Nail care
When having your nails done repeatedly, there are a few issues that can arise from contant product being bonded to your nails.
For example, when you don’t allow your nails to breathe once in a while, the bonded gel or acrylic can damage the layers of keratin protein within your nails and cause the nails to split. This is painful and can prevent you from being able to have a fresh set of nails put on to avoid further damage.
Another common issue that many people experience with long term acrylic nail use is their nails curling inwards from the sides. This is often caused by trauma to the nail bed or the nail itself, which can come from years of acrylic use without giving your nails a break.
Many nail issues can be fixed or avoided altogether by having a break between each fresh set of nails. While you might have to live without your long, pretty nails for a week or so, your natural nails will thank you and leave them stronger and a better base for acrylics in the long run.
Summary
We hope that you’ve learned something interesting about nail care and the different ways that you can change your nails. If you’re interested in learning more about fashion and beauty topics, pop over to makeupwearables.com and see what else we have to offer!